
First you will want to have entered your First and Last Name and your email address on the User Settings page. Then tap the "Add A Sighting" button from the main page, and then tap the "+" button in the upper right to create a new Excursion.
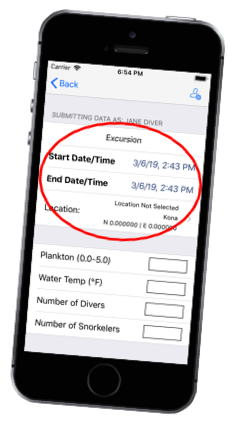
There are a couple of "required" pieces of information needed to submit a sighting, and the rest are optional. The Start and End Date/Time are Required. The date and time of the excursion should be approximately the entire time that you were in the water looking around. If you were in and out of the water multiple times, you should probably enter multiple excursions. But there are no absolutes. Once you create an Excursion in the App, the Excursion itself and the information about it you enter will stay in the App until you explicitly delete it. You don't have to worry about losing any information if you stop and restart the App. So you can start entering the information for all your Excursions anytime, with or without an internet connection, and then "Submit" them later on when you're ready.
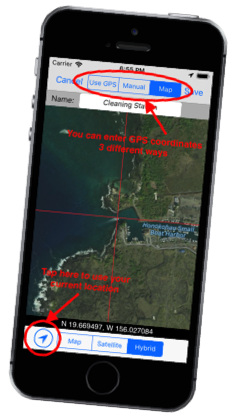
1) Use the GPS built into your iOS device
2) Manually enter the coordinates from another source
3) Place the red crosshairs over the point on the map where you were
Give the location a "name" and then hit "Save".